Getting Started
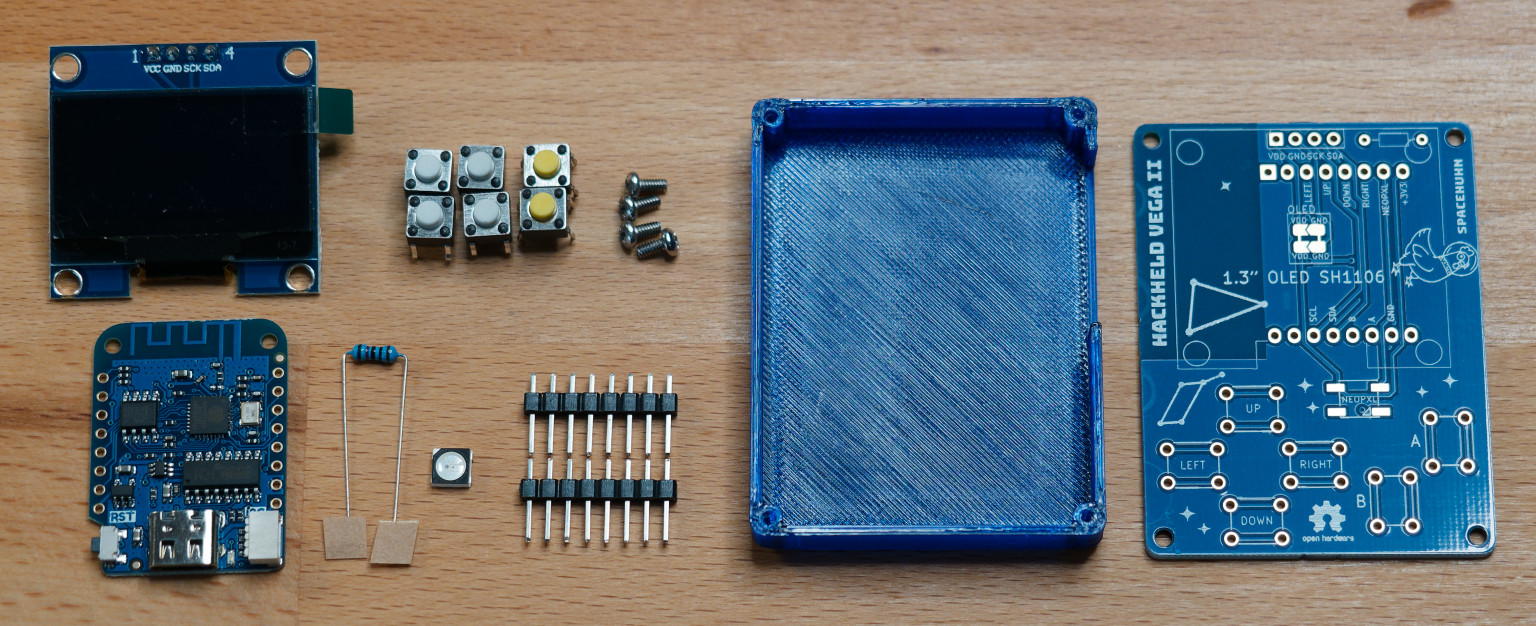
Here's everything you need to get started with the project.
Skills
The project is designed to be easy to assemble. You don't need any special skills.
If you can solder, you can build it; if you can't, you can learn it. So it's not that hard 😊.
If you've soldered something and worked with Arduino before, you'll have an easier time. But it's not necessary.
I recommend watching some soldering tutorials on YouTube if you've never soldered before. I found this one to be quite good and concise: Soldering Tutorial for Beginners: Five Easy Steps.
Adafruit also has a great Soldering 101 guide and Reference Cards:

Tools

| Tool | Description | Link* |
|---|---|---|
| Soldering Iron and Solder | To solder the components to the PCB. Any soldering iron should do, but I prefer the Pine64 Pinecil because it's open-source, USB-C powered and portable. | Amazon, Pinecil |
| Side Cutters | To cut the header pins. | Amazon |
| Screwdriver | To screw the case together. | Amazon |
| Tape | To prevent the backside of the OLED display from shorting out. | Amazon |
| Pliers | To remove the plastic bit from the OLED header. | Amazon |
| USB-C Cable | To power the Hackheld and program it. | Amazon |
Additionally, you need a computer to program the HackHeld. Unfortunately, you can't program it with a smartphone or tablet.
Parts
You can buy the HackHeld Vega as a DIY kit from my shop: spacehuhn.store
| Part | Description | Link* |
|---|---|---|
| PCB | The PCB is the heart of HackHeld. It connects all the components. | Gerber Files, JLCPCB |
| D1 Mini | The development board that powers the HackHeld. It doesn't matter which D1 mini you get, but I recommend the Lolin D1 Mini V4 with USB-C. | Amazon, Lolin D1 Mini V4 |
| OLED 1.3" SH1106 | The display of the HackHeld. It's a 1.3" OLED display with 128x64 pixels using the SH1106 driver. Make sure to use the 4-pin variant. | Amazon, Aliexpress |
| 10k Resistor | A 10k resistor is needed as a pull-up for the left button. You can use a through-hole resistor or a 1206 SMD resistor. | Amazon, AliExpress, AliExpress SMD |
| 6x Buttons | 6x6mm 4pin tactile push buttons. | Amazon, AliExpress |
| Neopixel LED | WS2812B LED. | AliExpress |
| Case | For 3D printing. | Printables |
| 4x M2 Screws | To screw the case together. I bought 4mm long screws. They should be at least 2.5mm and not longer than 10mm. | Amazon, AliExpress |
Make sure the OLED pinout matches the one on the front side of the PCB. It must be compatible with VDD GND SCK SDA. It's important that VDD and GND are at the same place because some displays have them swapped, which would create a short circuit.
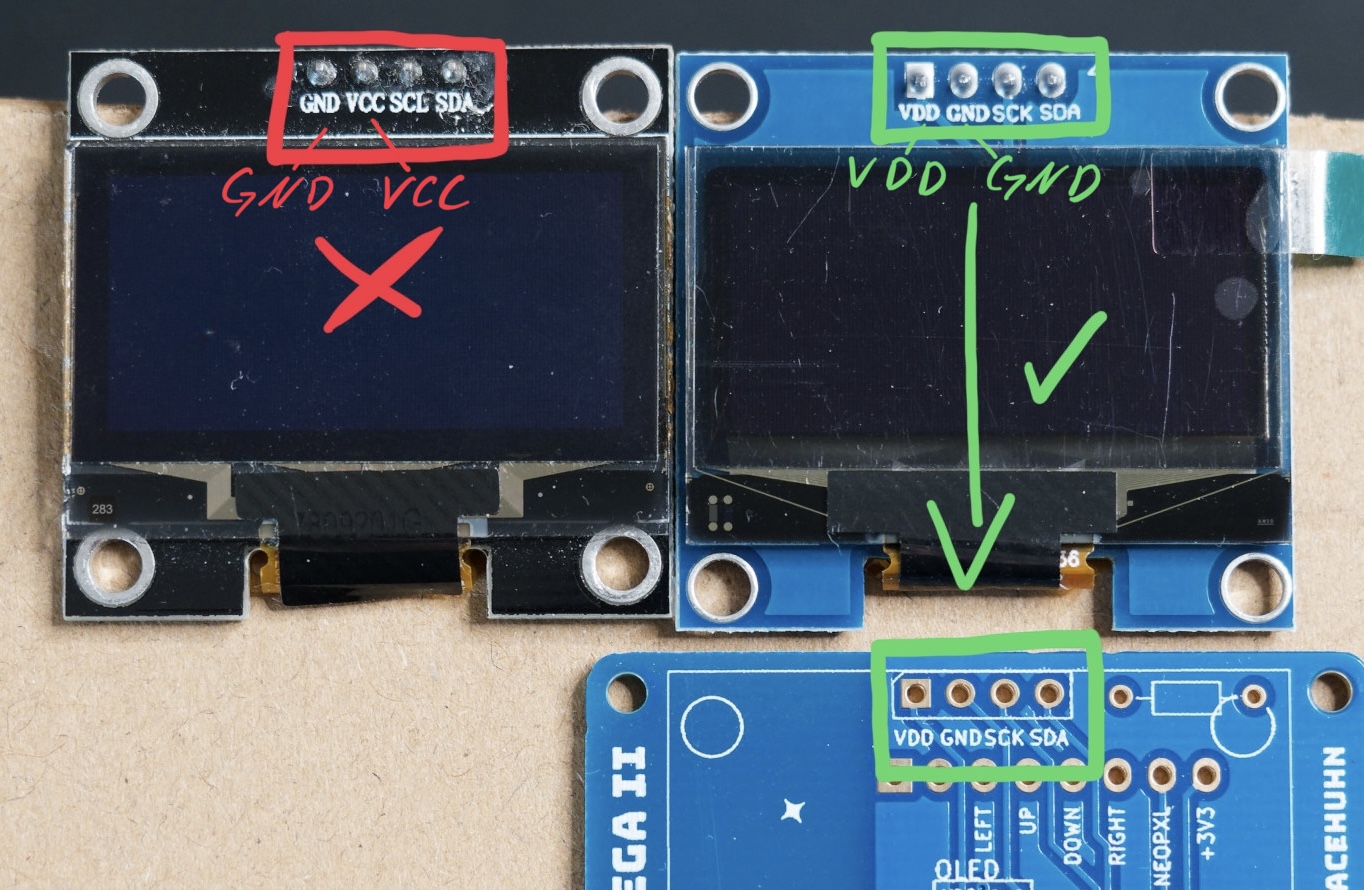 If you have the wrong display, there's a workaround.
*Links are affiliate links. If you buy something through these links, I get a small commission. You don't pay more, but you support me and my work. Thank you! 😊